Start by ensuring that you have the following equipment to hand:
- Developing tank, top and lid - Film spool - Spool funnel
Transfer your film to a spool in the 'Film Transfer Cupboard' in pitch black
Once finished, turn the top part of the tank into place so the funnel is trapped and turn until you hear a click. Now, put the lid on and then turn on the light.
Set your chemicals up in advance, ensuring that you have the right amount of film developer, stop and fix to fill the tank to the required level, which depends on the number of films. A single film spool takes 300ml of solution.
Check the correct timings and using a timer, start the process. Remember to agitate the tank regularly (every 1 minute, turn 5 times slowly).
The timing of the film developer will depend on the type of film being used and ISO so check very carefully or ask your teacher. TIP: To achieve a higher contrast, leave in the film developer for slightly longer than stated.
Ensure this process: Film Developer > Stop > Fix > Running Water > Wetting Agent
Squeegee or use your hand gently to remove excess wetting agent and hang with clips at both ends in the film drier. Label with your name and current date.
Once dry, cut up into strips of five (not six) and put into your archival sleeves. Now label with your name, date and reference i.e. location/event
Make a contact sheet and ensure it is placed before your archived negatives for reference.
These steps were important as i needed to learn how to do this in order to develop my own film.
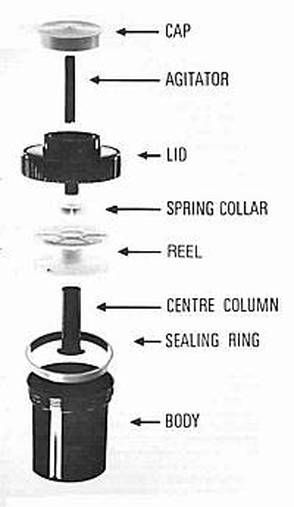
labelled diagram of the developing tank. The developing tank is used to develop rolls of film. After this process you need to hand the film roll up and allow for it to dry.
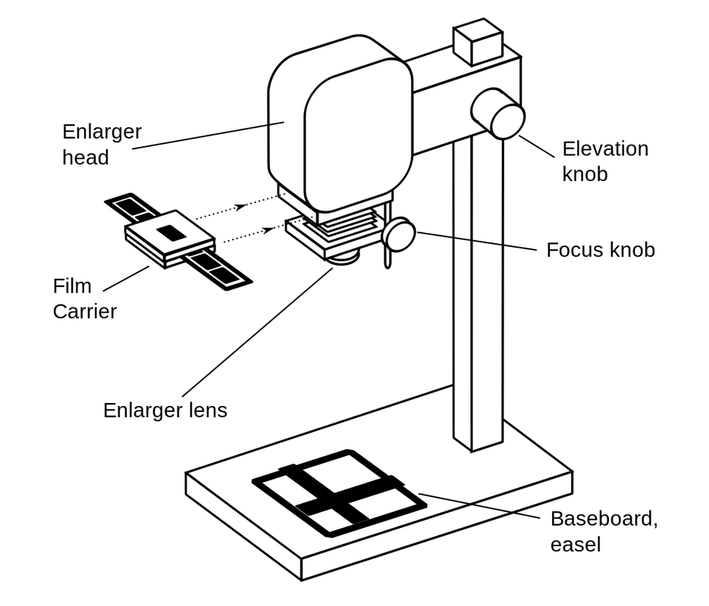
This results in the negatives being formed. Using an enlarger, the film photos can be produced.